Environment Setup
In this workshop, we’ll be working on GitHub Codespaces.
Before we begin, log in to your GitHub account, or sign up for one if you don’t already have one.
For this workshop, we’ll be using the following technologies:
Do not worry about installing them, we’ll be installing the required tools when needed.
Creating your Project
Throughout this workshop, we’ll be using an example project Marketplace.
It is a simple microservice that manages a SQLite database of orders and customers.
The microservice currently uses raw SQL to manage the database, we’ll be incrementally working on it to replace the raw SQL with SQLAlchemy, make use of ORMs, and then optimise our access patterns.
After each step, you can refer to the corresponding completed version of the code, under the branch step-#-<step-title>.
Now, let’s get started!
-
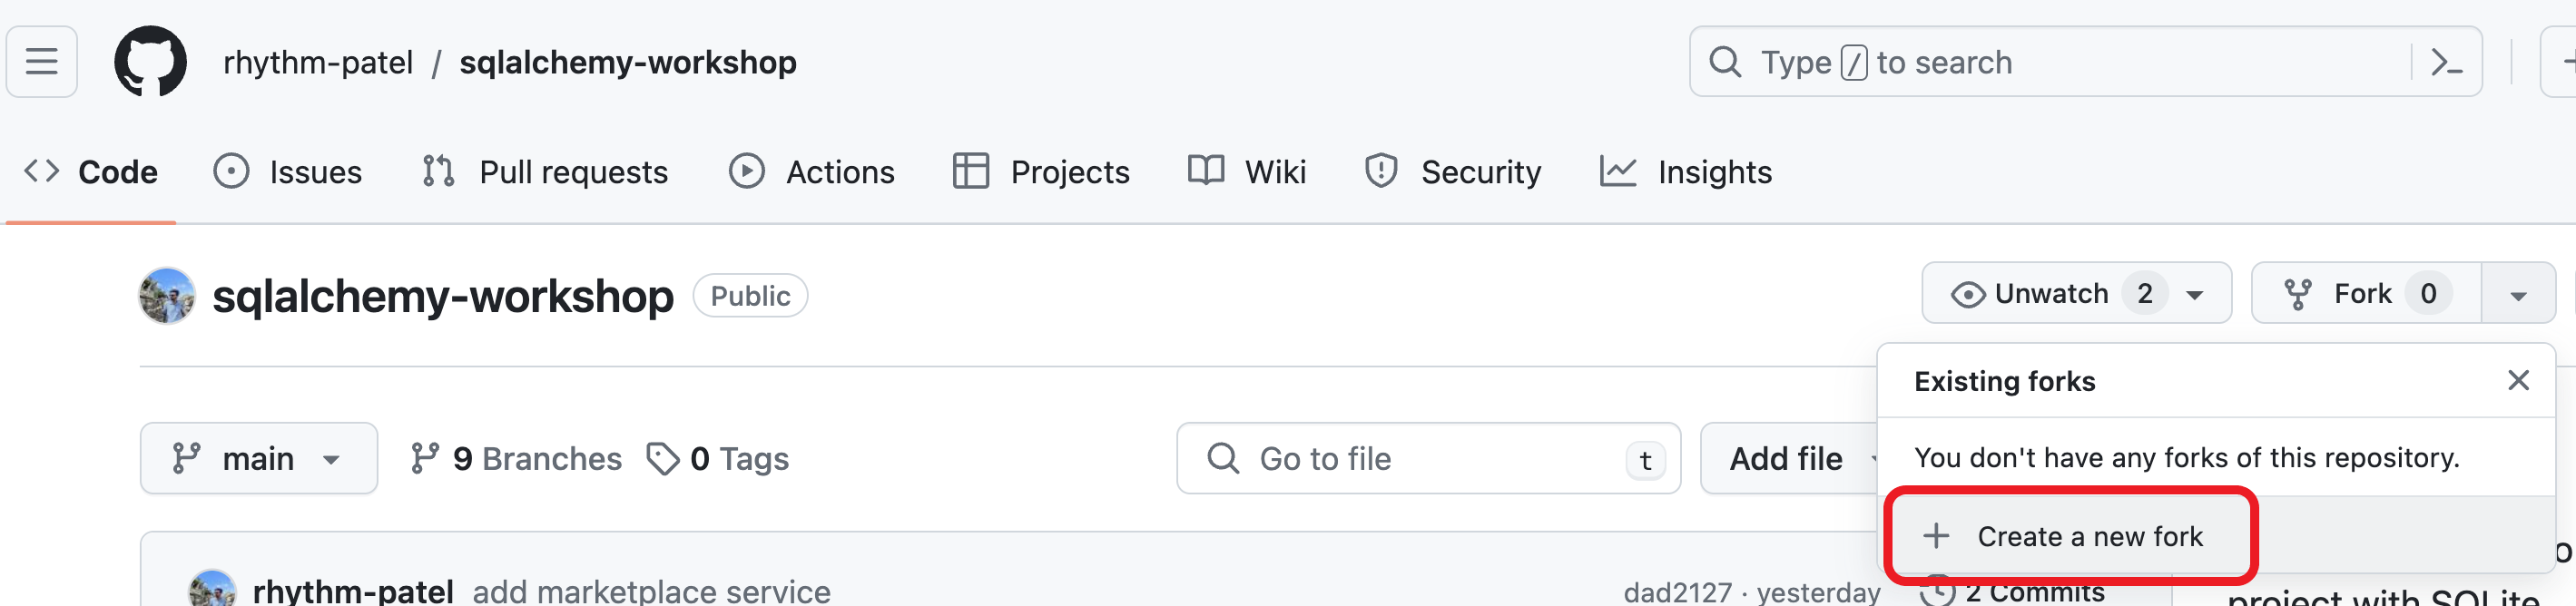
Visit the example repo and fork the repository by clicking “Fork” > “Create a new fork”. You will be redirected to a the fork of this repository in your account or organization.
-
Make sure to uncheck the box
Copy the 'main' branch only, to include all the branches.
-
Once your repo is created, click on the
Codemenu, and from theCodespacestab, clickCreate codespace on main. This will open the code in GitHubCodespaceswhere we will be incrementally making updates to the code.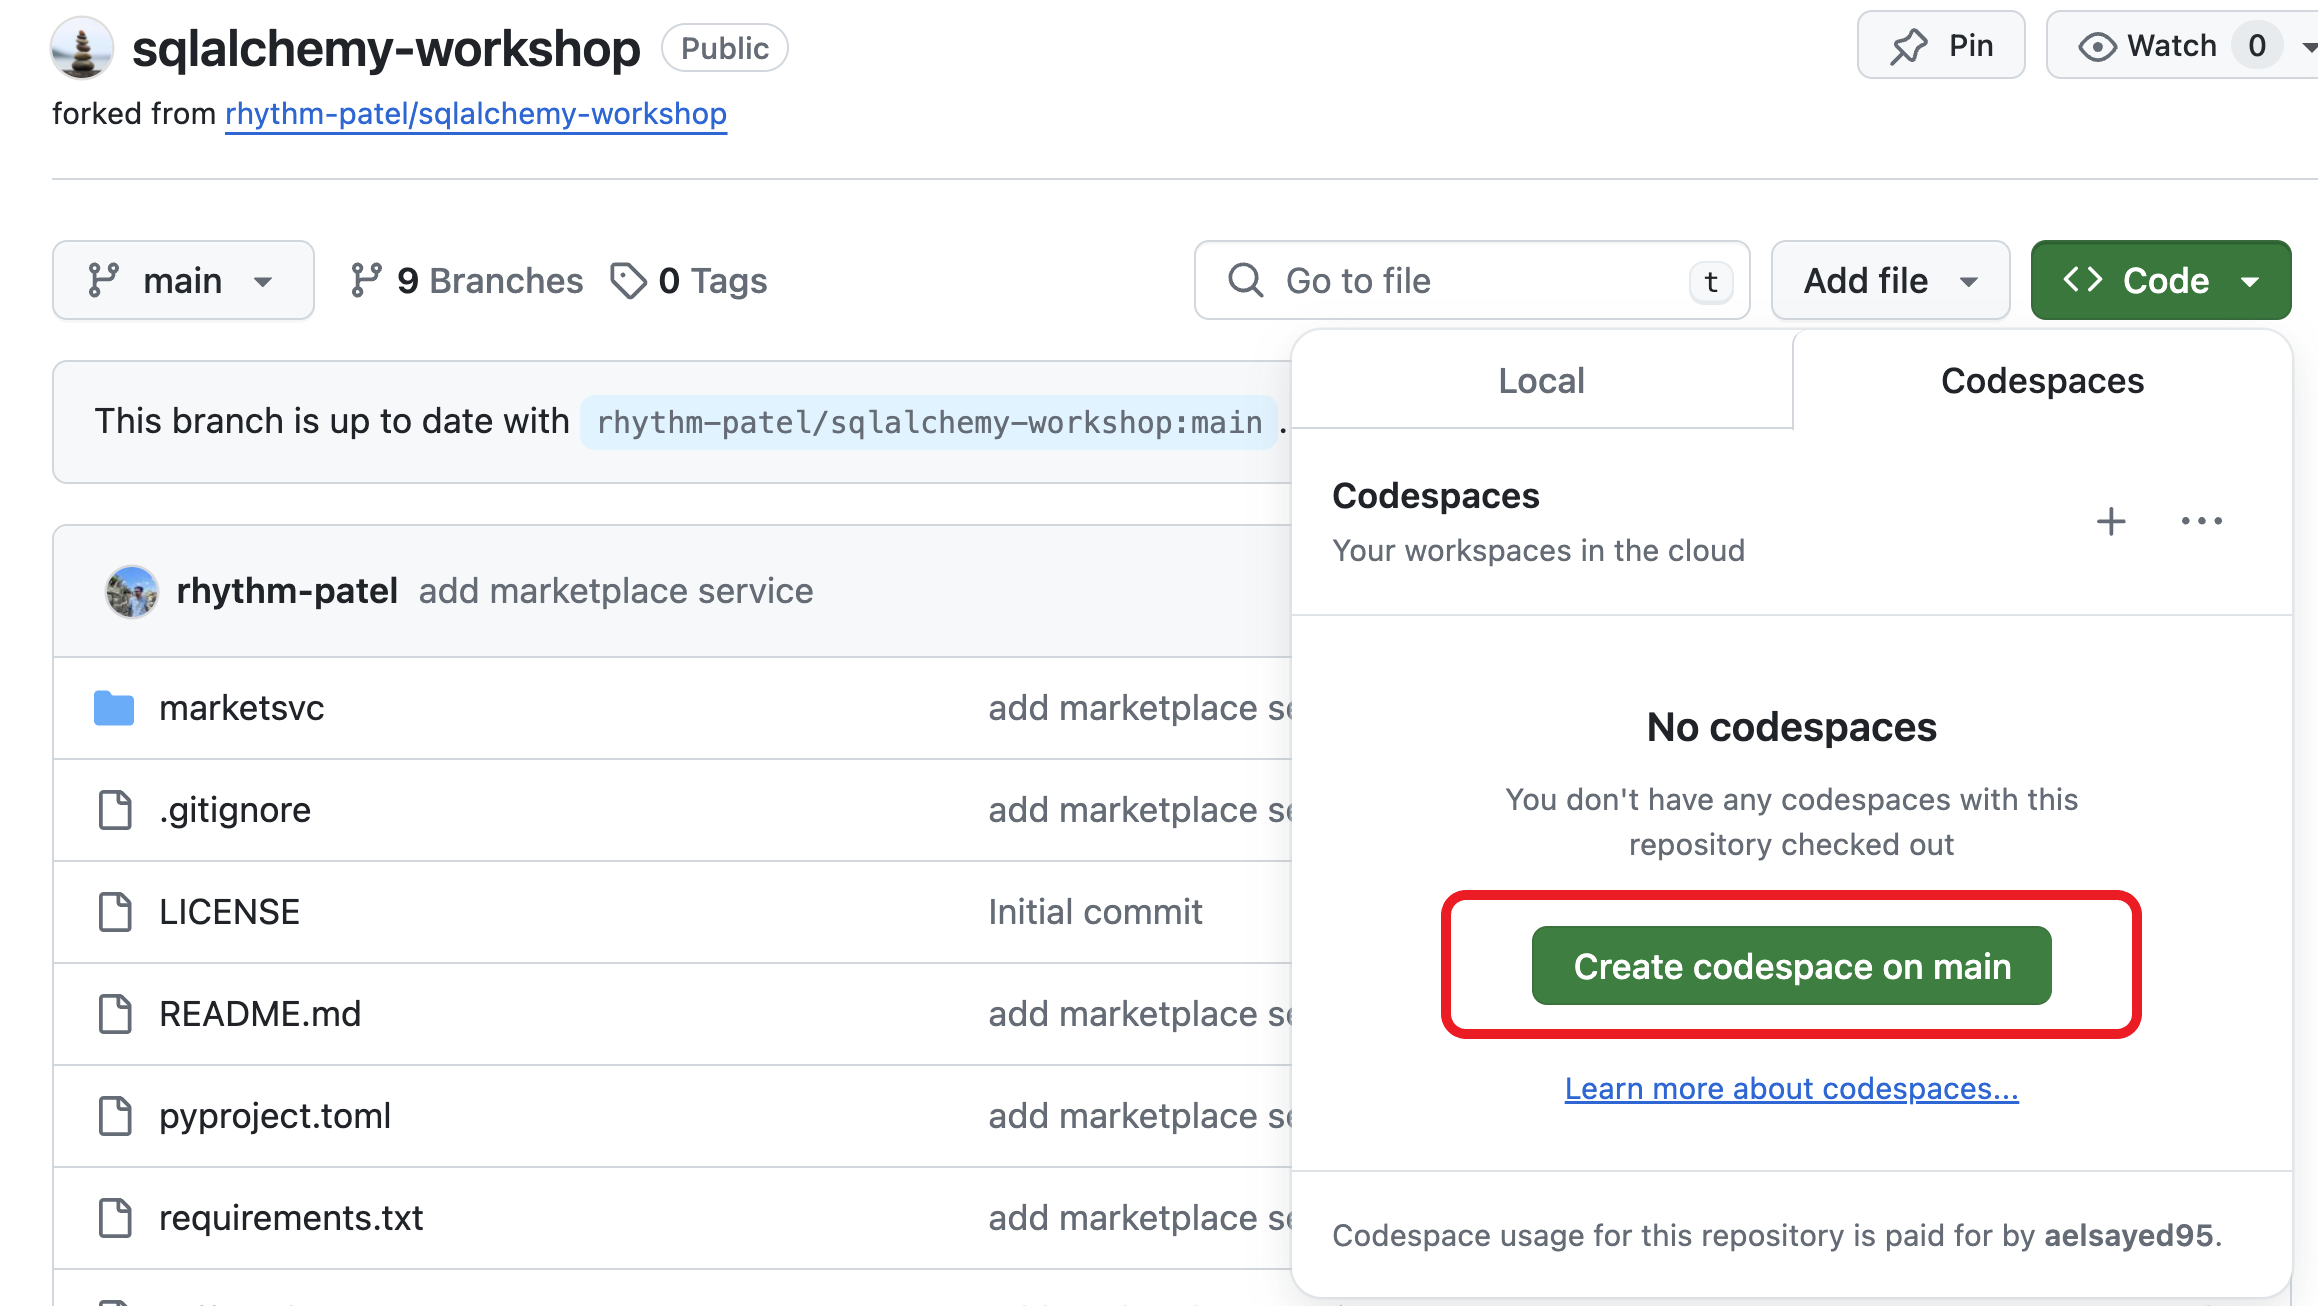
Creating a virtual environment
We’ll be installing our Python dependencies in a Python virtual environment (venv).
While on Codespaces, creating a virtual environment for our project doesn’t add much value, if you were developing locally or on a host shared by multiple projects, it is good practice to create a venv for your project’s dependencies.
To create and activate a Python3.12 venv:
python3.12 -m venv ./venv
source ./venv/bin/activate
NOTE: You can exit out of the
venvby typing:deactivate
Once you’ve activated your venv, you can now install PyPI dependencies.
We’ll be installing a few throughout this tutorial.
Useful Extensions
To make your development experience smoother, we want to enable IntelliSense. To do that for Python, you’d need to install the official VSCode Python extension.
Find the Extensions tab in the left panel of Codespaces, and search Python.
From the results list, find the extension named Python provided by Microsoft.
Hit install.
In the previous step, we’ve created a venv where we will be installing some extra dependencies. To ensure that IntelliSense will be able to recognise these dependencies, we need to point the Python extension to our venv’s Python path.
To do that, once the extension has been installed, open up any python file, for example, marketsvc/server.py.
On the bottom right corner of your Codespaces screen, you should see that Codespaces has detected the language to be Python and it shows the Python path of the interpreter it is currently using.
Click on the path to change it.
A drop down menu should appear.
Select Python3.12, the version with the path ./venv/bin/python.